
COME SIT WITH US! FREE IN-HOUSE CONSULTATION AT JB PRINT SOLUTIONS
Come Sit With Us!
At JB Print Solutions we believe in meeting with our customers, feeling the paper, seeing the potential, hearing the presses running, and smelling fresh print! This is why we’re happy to offer FREE in-house consultations.
We know that starting a project, whether it’s re-branding your company or getting new business cards, can be a daunting task. Our team has the knowledge, experience, and technology to make that process easier from start to finish.
Here are 5 reasons meeting with us will make your project a success:
1. We’ll talk design!
Collaborate with our designers to reduce design costs and bring ideas to life in print. If you’re stuck for ideas let them guide you to a design that fits your company perfectly. They can help you create new designs from scratch, help layout your content in an appealing manner, revisit and revamp old designs, or help completely rebrand your business for a fresh new look. Our team also provides creative solutions and suggestions to make the most of your project.
2. We’ll look at product options!
We’re experts when it comes to choosing products to best capture your vision. We will provide you with an array of options and show you new, exciting ideas. We can also provide samples of our stock and finishing options to help you visualize your product. Our team can even print you a sample in-house once your product is designed.
3. We’ll plan efficient, realistic timelines!
We understand that everyone has busy schedules and timelines to meet which is why we’ll help you prioritize your print projects. Planning ahead will help streamline the process, avoid errors and will allow your product to be printed on time. When you come in for a meeting at JB, we’ll ensure we have a clear understanding of what you want and when you need it.
4. We’ll prepare or review estimates!
Our estimator can prepare a cost list for you allowing you to plan or budget your investment in each project. We can answer questions about pricing and offer cost saving options when available.
5. Most importantly...
You’ll get to know us and we’ll get to know you!
Call us or send an email to set up a meeting today!
REDUCING OUR CARBON FOOTPRINT IN THE WORKPLACE
Being green - Reducing our carbon footprint.
Statement on climate change from 18 scientific associations
"Observations throughout the world make it clear that climate change is occurring, and rigorous scientific research demonstrates that the greenhouse gases emitted by human activities are the primary driver." (2009)
At JB print we are committed to doing our part to reduce our carbon footprint. Reduce, reuse, recycle!
We have implemented many processes and programs throughout our company to help us reach this goal and are constantly striving to do more.
Let's take a look at our departments and then company wide at what we are doing everyday!
Front Offices
• Recycling boxes at every desk
• Scrap paper from the copier and from cut offs of press jobs are padded and used for notepads
• Reusable notes - messages that are consistent are reused over and over, reducing the need for post it notes
• We reuse office supplies such as paperclips and elastics
• Rechargeable batteries for high usage electronics such as keyboards and mouse
• Non rechargeable batteries are recycled as well as ink pens
• Electronic waste - computers, monitors, keyboards etc. are recycled as we upgrade equipment.
• Previously enjoyed office furniture is purchased instead of new whenever possible
• Our old furniture and supplies that are still in working order are donated or placed out at the curb for reuse
• When possible our proofing of client jobs is done digitally
Prepress and Large Format
• Design smart imposition to optimize press sheets
• Chemical free plate making process
• The aluminum plates are recycled after use
• All scrap or excess paper is reused or recycled
• Substrates for large format mounting are reused or recycled when possible
• Scrapes of print material and laminates are kept and used
• Paper tubes and cardboard/plastic packaging is recycled or reused
Digital
• Energy star efficient copiers
• Environmentally responsible papers with recycled post-consumer waste content.
• All toner cartridges are recycled
• Copier parts are recycled or repaired if possible
Presses
• Low volatile organic compounds (VOC) inks and solvent, vegetable based inks
• Reduce paper usage by ordering the correct amount of paper for a print job
• Pressmen set up with scraps of waste from other print jobs
• Alcohol free fountain solution is used for washing up the presses
• Wash-ups are mostly done using water, reducing chemical usage
Bindery, Shipping and Delivery
• Waste paper from plate making and paper packaging is reused for packing our product for shipping and delivery
• Our supply boxes and packing material are reused for our own products
• Machinery is turned off when not in use
• We coordinate delivery and pick up of supplies with other companies sharing room on their trucks
• We organize and arrange delivery twice a week to maximize and reduce driving time
Company Wide
• Computers are put to sleep at night
• Equipment not being used it turned off
• We use green cleaners for office and kitchen
• Our kitchen is supplied with china dishes to reduce the use of paper products
• The washrooms and kitchen have reusable dishcloths and towels instead of disposable paper products.
• Tea and coffee are available in the kitchen to reduce use of take out cups
• A water cooler is available to reduce the use of plastic water bottles
• Everything possible is recycled in the kitchen
• All non-recyclable burnables are taken home my a member of our staff and burned reducing garbage output
• All food scraps are composted in the green bin
• We use eco friendly salt on the ice of our outside walkways
• The outside lights are on a dusk till dawn timer
• All office lights are turned out at night
While we are doing a lot already to be green there is always room for improvement!
Some ideas for goals in 2018
Different green challenge every month.
For example: reduce your disposable cup usage by using a refillable cup or making your beverage at home or in the office.
Starting a green wall. Adding plants the clean the air. Growing vegetables, herbs and spices in our windows for sharing.
Group sharing of food and beverage supplies. Company peanut butter, milk, sugar to reduce packaging usage.

THE CHRISTMAS SHARING PROGRAM
“Tis better to give than receive!”
Christmas time can be a challenging time for people in need. Here at JB, giving back is so important to us! We are able to help out, lend a helping hand, and so WE DO!
The Christmas Sharing program is in its 50th year, started back in 1967. Now, 1300 families in the Quinte region receive food baskets each Christmas. It’s a great way for local families and businesses to help members of the community who are in need. Providing food baskets for families means they will have festive meals with their loved ones during the holidays.
I’ve been doing Christmas Sharing since I was a kid. My siblings and I would help my step Dad and Mom assemble and deliver food baskets from his work, where he headed up their Christmas Sharing team at Black Diamond. I used to think it was a great way to get a day off school, but now realize it was so much more than that. My parents were teaching us how important it is to think of others and give back when they are in a time of need, that Christmas time is about getting together and spending time with loved ones. Christmas Sharing makes that happen for people!
I’ve continued to be a part of sponsoring families in my adulthood and plan to involve my daughter when she’s old enough to help out! It is so important for me to teach my little one that giving back at Christmas and all throughout the year is so meaningful! Continuing family traditions of volunteering and donating during the holidays is definitely something I plan to pass down to her.
For a number of years, the team at JB have been a part of donating to the Christmas Sharing program. All funded by the staff at JB, we come together to shop, assemble and deliver baskets to families. We also love adding in a few personal touches to the baskets, extra festive things for the family to use for their Christmas dinner! At JB we all have a hand in prepping for food baskets, I love how the team is so willing and eager to help out, it makes my heart happy to work with such a generous group of people.
Knowing that families will have good food on their plates and time spent together; eating, laughing and having fun definitely puts a smile on my face and warms my heart.
Merry Christmas and Happy Holidays from the staff at JB Print Solutions!
CHRISTMAS DISPLAY AT CITY HALL, QUINTE WEST
Happy December, Quinte West!
Seriously, how is it December already? In just a few short weeks we’ll be celebrating Christmas with our families and ringing in the New Year with our friends. But first we have a month filled with designing and printing your unique projects.
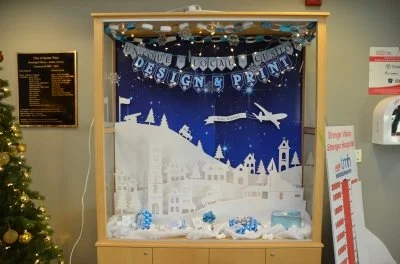
For the second year in a row we’ve have the pleasure of decorating the display case at City Hall. This time last year the staff at JB, our customers and passerby’s were overjoyed to see the whimsical “Santa’s Print Shop” display. It was filled with bright colours, textures, print samples and classic Christmas magic!
How do we live up to that? How can we share the magic of paper with our community in a new way?
The wheels were turning on this year’s display months ago (think “Christmas in July!”) Before we could get started on the creative part there were some pressing questions we needed to answer: “What do we want to say?” “What do potential customers want to see?” “How can we incorporate paper chains once again this year?” With so many people in the shop, there were plenty of ideas bouncing around throughout the entire process.
From ideas to installation, here are a few things we learned along the way:
1. One idea is stronger than a hodge podge of many ideas.
We did our best to merge the ideas we loved (Christmas colours, candies, advent calendars, paper cutouts etc.) but came to the conclusion that our idea would be stronger if we picked one. A paper cutout theme naturally fit with our products.
2. What do you want to tell your customers? (Decide this from the VERY beginning.)
Without a specific goal it’s hard to narrow down what will work for the project and what won’t, which means you’ll wind up making more revisions than needed!
3. Everything takes longer than expected
Even a theme that looks clean and simple like a paper cutout takes many steps to design and even more hands to produce. Don’t leave anything to the last minute, you might need that time to trouble-shoot.
4. The more the merrier!
Working as a team provides the best ideas, unique solutions and the quickest turnaround. We had just about everyone in the shop working on this project from idea to installation.
5. Be ready to problem solve.
Once we were ready to install the display we had everything we needed, and then a whole bunch extra. Good thing, too! In a pinch, and with just a bit of craftiness, we had the right tools to bring the whole display together. (And not a bit was wasted – stop by the shop to see our JB Christmas tree and frosty window graphics.)
Our cozy paper town display can be viewed at City Hall in Trenton until December 31, 2017.
Happy Holidays Quinte West, Belleville, Prince Edward County and surrounding areas! We hope you are as excited about our “paper town” display as we are.
Emily Gebhardt
Graphic Designer at JB Print Solutions

DESIGNING WITH SPECIAL FINISHES:
A Designer’s Guide to Setting Up Special Effects for Digital Printing (Gold & Silver Sleeking, Lamination and Spot Clear Dry Ink)
What is Laminate?
verb | lam•i•nate | \’la-mǝ-nāt| – To unite layers of material by an adhesive or other means
Lamination is plastic film in various finishes that are applied to an entire printed sheet to create various visual and tactile effects.
** No extra set-up is required for your file. **
Image Specs: width of an image cannot exceed 12 in
Length cannot exceed 18.75 in
We have Soft Touch, Matte & Gloss laminates
What is Sleeking?
verb| \’slēk\ – To cover up: gloss over
Sleeking is the process of bonding a foil finish to something that is printed in a toner based ink on nearly any printed or laminated surface. Sleeker foils can be applied as a spot finish or as full coverage to a background, which can then be overprinted
** Sleeking requires special set up – see below: “SETTING YOUR FILE UP FOR SLEEKING” **
Image Specs: width of an image cannot exceed 12 in
Length cannot exceed 18.75 in.
Sleeking finishes work best on coated stocks (textured and uncoated stocks should be avoided when adding sleeking to a design)
We have Gold, Silver, White, Holographic & Spot Gloss

SETTING YOUR FILE UP FOR SLEEKING:
There are two ways to set up a file depending on the artwork:
Option A: The elements being sleeked are on a white background (See sample photo A) ** set up notes to follow
Option B: The elements being sleeked are surrounded by colour (See sample photo B) ** set up notes to follow
A – Sleeking on a white background

B – Silver Sleeking with a coloured background
Start by designing your product as you normally would. I find it helpful to have one page in your file that shows the overall design so you can easily copy and paste items from that “Master” page. (For Option A: Sleeking on a white background see Sample Photo C below, For Option B: Sleeking on a coloured background see Sample Photo D below)
C – Master Page overall design set up for sleeking on a white background. See Photo Sample C2 for the printed result.

C2 Sleeking Sample Option A: Sleeking on a white background. In this case we printed blue on top of the silver sleeking to achieve a metallic blue effect

D – Master Page overall design for sleeking on a coloured background
Once you have a finalized design and have decides what elements you would like to have sleeked:
Step 1:
Create two new pages. Copy and “paste in place” the non-sleeked (printed) elements onto one page. Next, copy and “paste in place” the sleeked (silver or gold) elements onto the other. (For Option A: Sleeking on a white background see Sample Photos E and F, For Option B: Sleeking on a coloured background see Sample Photos G and H)
*NOTE: IT IS VERY IMPORTANT NOTHING MOVES/CHANGES FROM ITS ORIGINAL LOCATION ON THE MASTER PAGE OR THERE WILL BE ALIGNMENT ISSUES

E – Business Card set up for sleeking on as white background with colour overprint.
This is the non-sleeked/print page in your indesign file. ** Please note that in this specific case we are overprinting blue onto the silver to create a metallic blue, that is why the “PRINT” word is on both pages. If “PRINT” were to just be silver, it should only appear on the sleeking page. **

F – Business Card set up for sleeking on white background with a colour overprint. This is the “sleeking” page in your indesign file.

G – Business Card Set up for Sleeking on a Coloured Background. This is the non-sleeked/print page in your indesign file.

H – Business Card Set up for Sleeking on a Coloured Background.
This is the “sleeking” page in your indesign file. See Sample Photo H2 for the printed result. shows a digital press sheet with silver sleeking – This sheet will pass through the digital press one more time to have the colour/non-sleeking page printed over the sleeked graphic.

H2 – This photo shows a digital press sheet with silver sleeking – This sheet will pass through the digital press one more time to have the colour/non-sleeking page printed over the sleeked graphic.
Step 2:
On the sleeking page, make everything 100% black only (For Option A: Sleeking on a white background see above Sample Photo F, For Option B: Sleeking on a coloured background see above Sample Photo H)
Step 3:
Option A: Sleeking on a white background
Step 3A: No extra steps are required after this point for sleeking,so you can just save your multiple page pdf (sleeking page and non-sleeking/print page)
* In this specific case we are overprinting blue onto the silver to create a metallic blue, that is why the “PRINT” word is on both pages. If “PRINT” were to just be silver, it should only appear on the sleeking page. (See Sample Photos E and F)
OPTION B: Sleeking on a coloured background
Step 3B: On the sleeking page, add a .25pt Black stroke to everything (See Sample Photo I) *Stroke size might change depending on your design, we will advise 🙂
Note: the stroke is in pink so you can visually see it in this sample, however it should be 100% black only also

I – Sleeking Set Up for Business Card on Coloured Background. A .25pt stroke has been added to the sleeking graphic to help the colour print page align with the sleeking page
Why is this necessary? It is important to have a slight overlap in colour and the sleeked elements so no white “shadow” areas will show on the end product.
When the paper has to be run back through the digital press to add the layer of ‘coloured’ items on top of the sleeked elements, even the slightest change in registration will be enough to offset the colour and create that white gap. As you can see in Photo Sample J, the colour print will overlap with the sleeking to avoid any white shadow areas.

J – Business Card Set Up for Sleeking on a Coloured Background. See Sample Photo J2 for the printed result.

J2 – This photo shows the finished business card with silver sleeking on a coloured background.
If there was no stroke added to the sleeking page you will see a slight white space between the sliver sleeking and the blue background. (See Photo Sample K)

K – Business Card Set Up for Sleeking on a Coloured Background – no stroke has been added to the sleeking page which results in a thin white “shadow” if the colour print and sleeking print don’t align 100%. See Photo Sample K2 for the printed result.

K2 – Silver Sleeking on a Coloured Background. The colour/non-sleeking print and the silver sleeking did not align because a stroke was not added to the “sleeking” page in indesign.
Step 4B:
Save your multiple page pdf, dont forget to add .125″ bleed on all edges and save the PDF using your document bleed settings!
SETTING YOUR FILE UP FOR CLEAR TONER
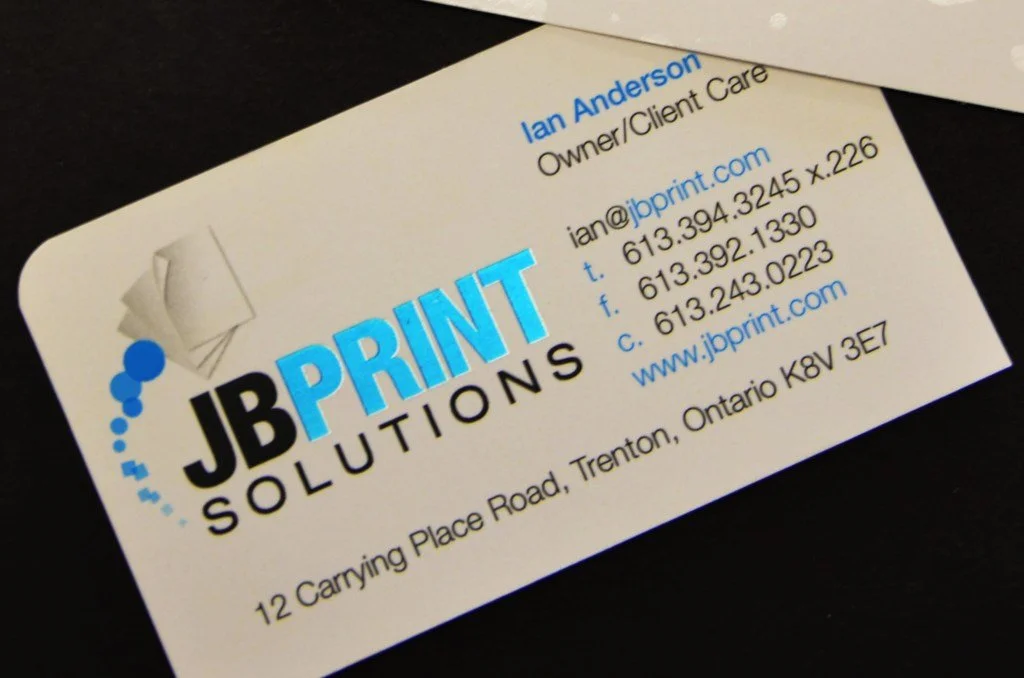
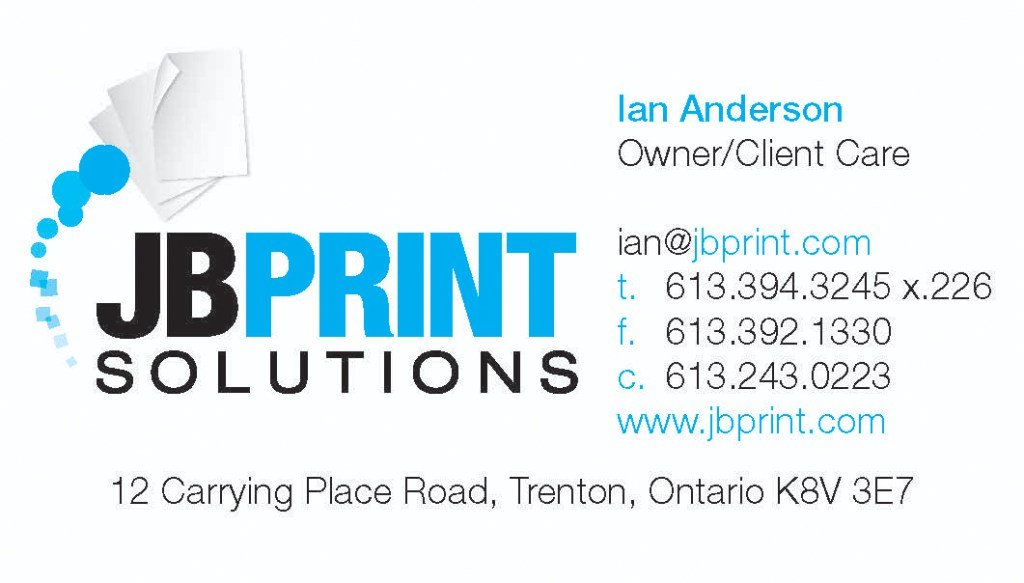
Business Card with Spot Clear Toner
Clear toner is applied directly from the Digital press like the other CMYK toners.
The set-up can be a bit tedious because if one step is missed or not done correctly then the machine will not recognize to print the clear toner. There are steps below for setting up and saving a pdf as well as an InDesign screenshot to use for reference.
** In addition to the steps below, make sure in your pdf we end up with two extra pages; one page just has the clear elements, and the other page has just the printed elements. This is in case we have to print the clear more than once for it to show up better visually. **
INDESIGN
1. Add a new layer in the layers palette and name it Clear.
2. Move the clear layer to the top in the layers palette.
3. Add a new color in the swatches palette and name it Clear.
Important:
This is the default in some DFEs. It’s very important to use the same swatch name across all applications you might use. The swatch name is case sensitive.
4. Designate the Color Type as Spot.
5. Set the Color Mode to CMYK: 0/100/0/0. You can choose any of the 4 process colors and set it to 100%
6. Assign the color Clear to fills and strokes of text or shapes created in InDesign and move them to the clear layer.
7. To print clear over an image, text or graphic, set it to overprint so it will not knock out any image below. Select Window > Attributes > Overprint Fill and/or Stroke.
Graphics from Adobe Illustrator
Vector graphics can be pasted into InDesign and designated to print with Clear Dry Ink as a watermark or to print over colors or photographs.
1. Copy and paste a graphic from Illustrator into your InDesign document.
2. Designate the fill and/or line to be Clear.
3. Move all clear elements to the clear layer.
4. Set all clear elements to overprint.
Creating a High-res PDF For Clear Toner
It’s important to choose the correct settings when saving a PDF for printing with Clear Dry Ink.
1. From the main menu select: File > Adobe PDF Presets > Press Quality and click save
2. Under Compatibility choose Acrobat 6 or higher.
3. Under General check > Create Acrobat Layers.
4. Select Compression >Color Images
Do Not Downsample Compression > JPEG
Images Quality > Maximum Grayscale Images
Do Not Downsample Compression > JPEG
Images Quality > Maximum Monochrome Images
Do Not Downsample CCITT Group 4
5. Select Marks and Bleeds > Set up Marks and Bleeds if desired.
6. Select Output >Color
Color Conversion > No Color Conversion Profile Inclusion Policy > Include All RGB and Tagged source CMYK Profiles.
7. Click on Ink Manager and make sure the box forAll Spots to Process is unchecked.
8. Click on Save Preset and name it. (We suggest Xerox Digital Press Clear.)
PAPER SPECS:
For Laminating you can use either coated or uncoated paper. Text weight paper will wrinkle so any kind of light to heavy cardstock is recommended. Be sure to let us know if you want lamination on one or both sides.
For Sleeking we suggest using only coated paper, uncoated paper can be used but the coverage of the sleeking material imperfect and doesn’t stick 100% to the area. Heavier text weight papers can be used, as well as sticker material but we recommend cardstock for best results
Clear Toner will work on any kind of paper or weight of paper. Results are best on a coated matte paper.
*Sometimes multiple passes are necessary to get the optimal results, depending on the paper used.
Any questions? Send an email to Emily, creative@jbprint.com or give us a call at 613-394-3245 x223. Want these notes in a handy set up sheet that you can keep at your desk? Get the PDF by emailing us or stopping in to pick up a copy.

CASE STUDY ESSENTIAL CARE FOR YOUR PETS
Hello, let me introduce you to my little "pet hobby" Essential Care for your Pets, Family and Home.
I have been using essential oils for their many uses for years. Including home remedies, cleaning and personal care for myself, family and friends. Expanding my recipes to include physical and emotional care for pets was a logical addition.
After much research, I became aware of concerns with using essential oils for pets. Misuse or poor quality oils have been to blame in most cases for adverse reactions regarding usage for pets (some oils are to be avoided completely). After many years of service to the pets of the Quinte region through Trent Pet, Super Pet and Teri's Pets Plus, I was concerned that this popular alternative treatment option may harm many of the fabulous critters that I have had the pleasure of meeting.
I launched Essential Care for your Pets, Family and Home to better serve the many wonderful pets and their owners. I defer to and follow several Veterinarians literature and experience, who recommend remedies for companion animals for improved emotional and physical well being.
In order to be ready for a trade show less than 4 weeks away, JB Print provided the solutions that I needed to be ready. The team got started right away on my designs for business cards, labels, product tags, banners, table top signs, and a mini roll-up banner. After much assembly on the kitchen table of an assortment of recipes for a rainbow of ailments and concerns my initial product selection was ready. With My vendor table highlighted with my JB Print products, that first event was extremely successful.
Thank you to my wonderful co-workers for their contributions. There is always time for an open discussion for any upcoming project with the JB team, they saw my vision and we nailed it! \
Teri Swindon
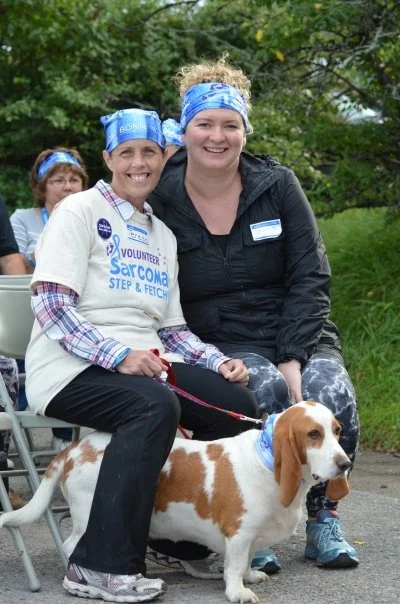
ANNUAL SARCOMA STEP AND FETCH

If JB could be summed up in one word it would be “community”! We are dedicated to our community and our many customers that make this a wonderful place to be. JB gives back to the community through various fundraisers and charity events and none more special to our hearts than the Sarcoma Step and Fetch recently held on Sept 24th.
Over 15,000 dollars was raised for Sarcoma research and more importantly awareness which was the primary focus of this event when it was started by our mentor and friend Teresa Bell eight years ago. Teresa saw the need to reach out and help others going through the same journey she was on; she wanted to make a difference. By creating this event to help educate us on this type of cancer, she helped bring people together for a common cause.
This year’s event was in her memory as we honoured our wonderful friend who ended her journey with sarcoma cancer in December 2016. Once again our community of businesses jumped on board with sponsorships, prizes, and individuals who gave their time to volunteer to man fact card stops, pass out water bottles, take registrations, bake, cook, set up and tear down, clean up, you name it, there was someone willing to help and for that we cannot thank you enough.
The News shows us so much negativity present in this world that it is wonderful to see people come together to do something positive and support one another. It is through our actions that we truly represent who we are as a person, as a company, or as a community. By doing what you can with what you have, you make a difference everyday in the life of someone.
Back on Sept 24th, young and old came together to be part of something special. Stories were shared as well as laughs and tears. Teresa taught us that it is not about what you can’t do, but about what you can do, and this wonderful community understands that message better than anyone.
As soon as my aunt had the idea of Sarcoma Steps we were all eager to help. She was always up to something, and as her family we followed her through every adventure; the Step and Fetch, although, is probably one of my favourites. My brother and I have run the children’s games since they were first started and it was amazing to see families come back year, after year. Being able to carry on her event was an honour.
Aunt Teresa was one of the most well spoken people I knew, and very quickly became a spokesperson for cancer research. She proudly represented an unbreakable will, with the drive to fight. She truly embodied the Fierce Grace name as a warrior against Cancer
The staff of JB print solutions would like to thank everyone from the bottom of our hearts for the wonderful support we received from our many volunteers and sponsors that made this event possible.
Thank you
Brenda and Shae-Lynn Bell

WELCOME TO THE JB TIMES!
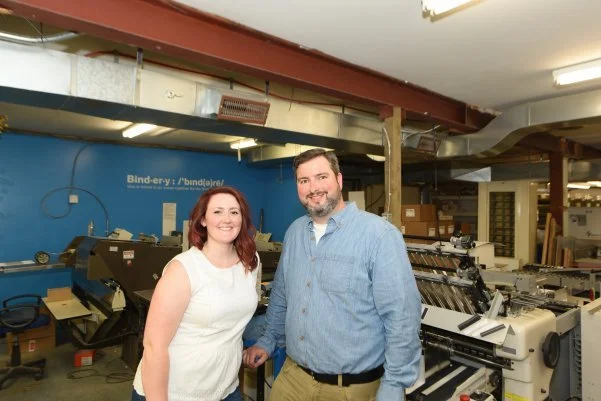
Oh hello there, welcome to the JB Times! I’m Tamara, graphic designer by profession and one half of the creative team at JB Print Solutions. My husband, Ian and I are the proud (new-ish) owners of JB. I’ve worked as a designer at JB for years, in June of 2016 we purchased the business from our friends (and my bosses), Mike & Teresa Bell. We had never really planned to own a print shop, but we are absolutely loving the change, the challenges and all the fun times that come along with working with such an amazing group of people. Between juggling busy print shop life, and crazy home life with a feisty two year old and bulldog puppy, we are loving it!
But enough about me, let’s chat about the Times! On this blog, we’ll be talking about a variety of topics, from; local charity initiatives to smelly inks and everything in between. You’ll be hearing from many of the staff, we’ll each take turns talking about different things; topics we’re passionate about, answer burning print questions (if that’s even a thing?), and some fun stuff too! Have you ever wondered how we produce those fancy special finishes, or wanted a behind the scenes tour of the shop? Check back in every now and then and see what fun we’re up to.
We hope you enjoy these little snippets of JB, we can’t wait to share with more with you about the life and Times of JB Print!